
| Rating/Slope | |||
|---|---|---|---|
|
|
72.1/129 | - |
|
|
|
69.6/124 | 75.6/130 |
|
|
|
66.8/117 | 72.1/123 |
|
|
|
64.4/109 | 69/118 |
|
| Tee | Out | In | Total |
|---|---|---|---|
|
|
3283 | 3343 | 6626 |
|
|
3032 | 3070 | 6102 |
|
|
2748 | 2799 | 5547 |
|
|
2477 | 2567 | 5044 |
-
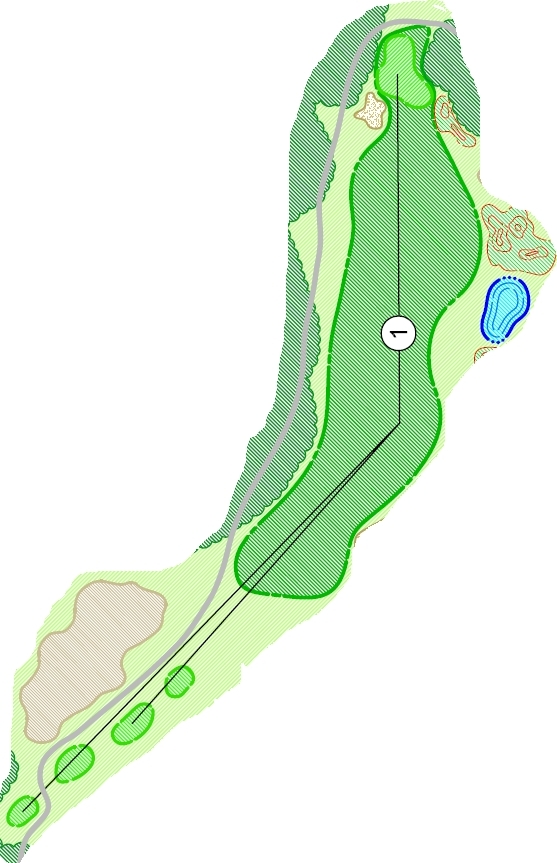
Hole #1
Pro Tip: 1. This dogleg left has an expansive fairway that opens up on the right side. A decent drive to the right center of the fairway will leave you with a mid to short iron into a slightly elevated green. Landing on the front third of the green will allow you to walk to the next tee with Par or better. -
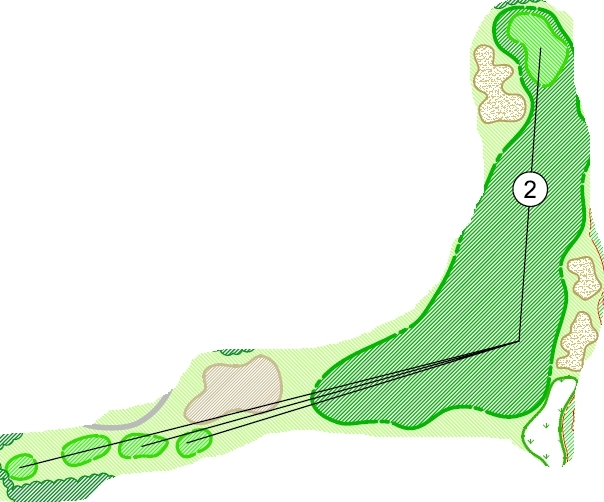
Hole #2
Pro Tip: 2. This short Par 4 is a severe dogleg left. Hitting a mid iron off the Tee will keep you on the fairway and leave a short iron into an expansive green. If you’re brave, you can cut the corner with a 3 or 5 wood and leave yourself a short pitch shot. -
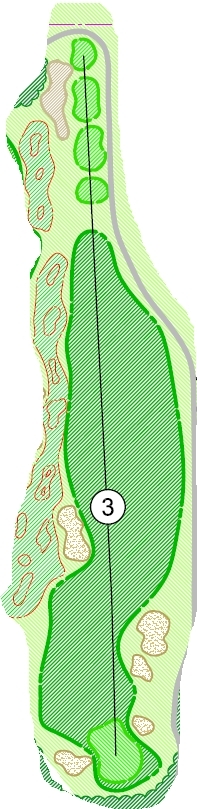
Hole #3
Pro Tip: 3. This is a straightaway Par 4 with OB on the left and 7 well placed bunker complexes. Keeping your drive to the right center of the fairway will leave you with a short iron second shot. -
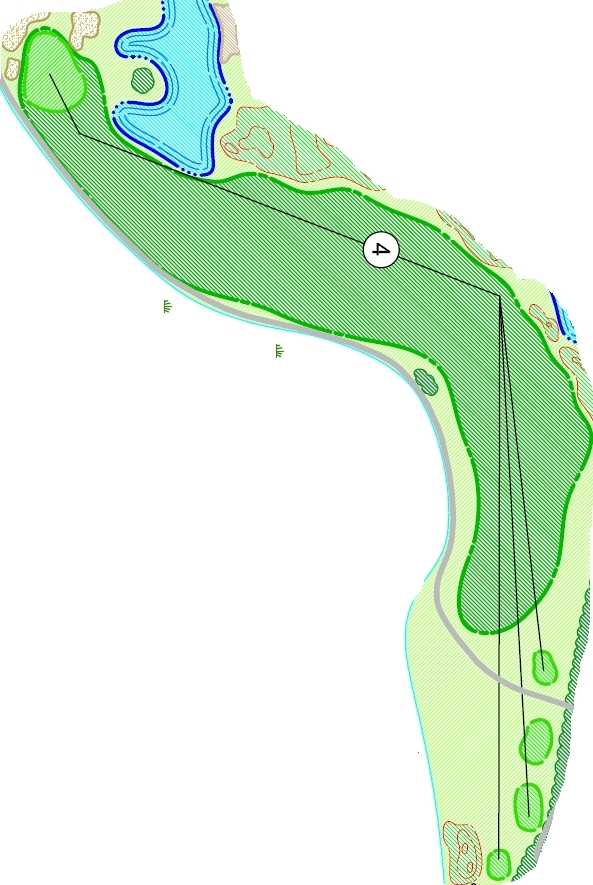
Hole #4
Pro Tip: 4. This dogleg left Par 5 is framed by water on the left and naturalized mounding on the right. Cutting over the water will afford you a realistic opportunity to reach the green in two. Don’t let your second shot leak to the right where another pond comes into play. -
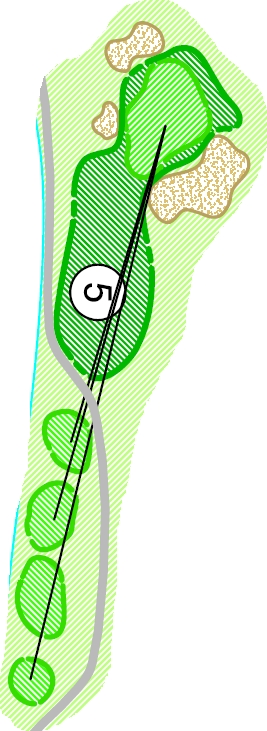
Hole #5
Pro Tip: 5. Depending on the prevailing wind conditions this can be a short or long Par 3. The elevated green complex is protected by 3 bunkers with the green having considerable movement. -
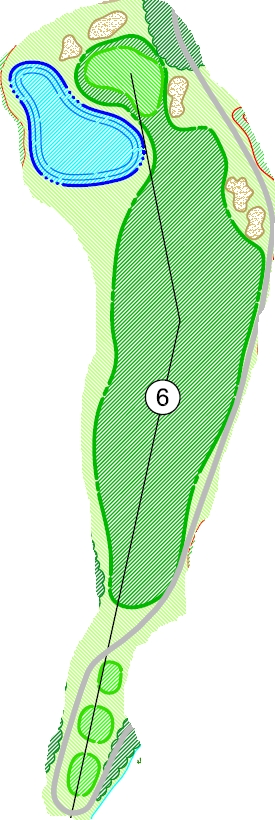
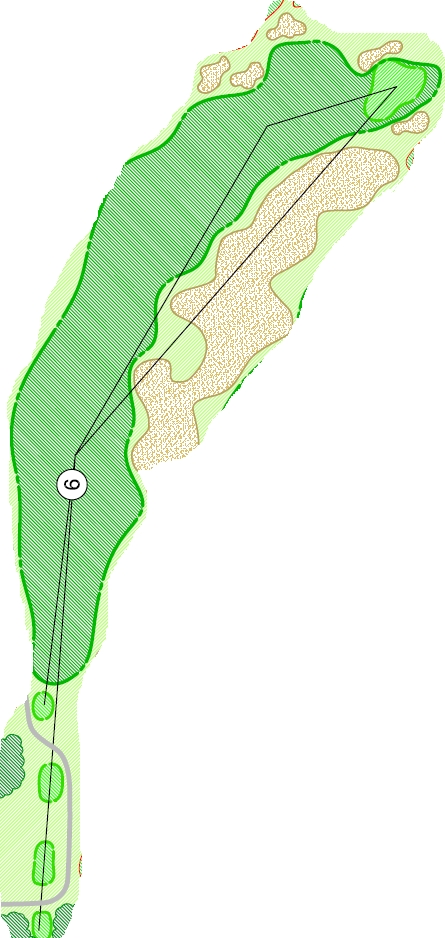
Hole #6
Pro Tip: 6. This is an open expansive driving hole but keeping your drive slightly right of center with leave you an open shot to a green protected by bunkering and a pond protecting the left half. -
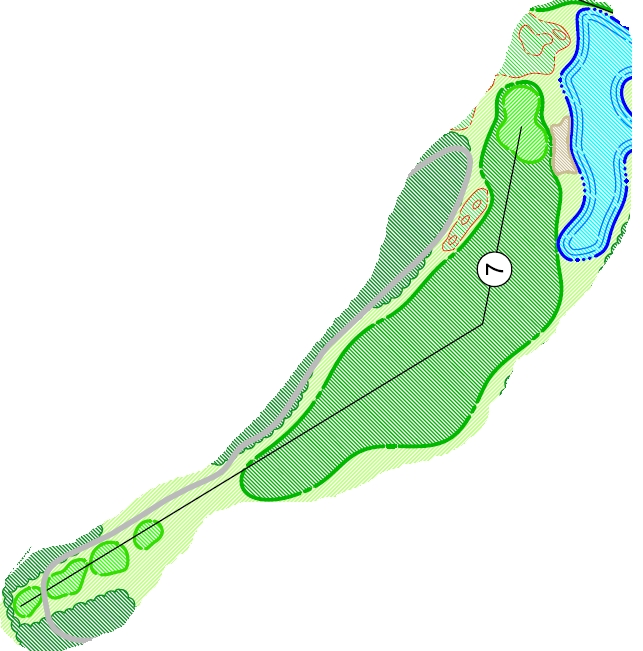
Hole #7
Pro Tip: 7. Keeping the driver in the bag on this hole is the best play if you wish to stay dry. A pond on the right that looks too far to reach off the tee is in play. If you cut the corner, you will be left with a short pitch to this elevated green. -
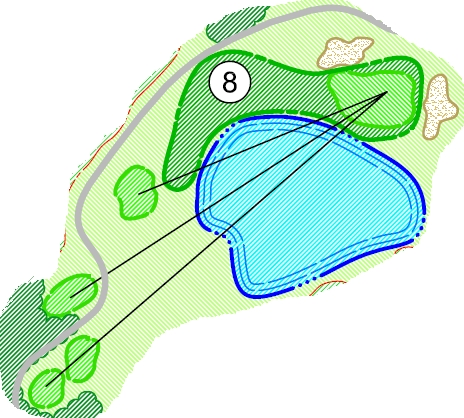
Hole #8
Pro Tip: 8. A Par 3 for the brave from the back 2 tee decks. You must carry the water in order to land on the putting surface. The forward 2 tee decks positioned to the left take much of the water out of play and allow easy access to the green. -
Hole #9
Pro Tip: 9. A classic Les Furber design, this long Par 5 is framed on the left side by a massive waste bunker that also comes into play on hole #10. Take care when putting as the green does have a considerable amount of movement that is difficult to detect. -

Hole #10
Pro Tip: 10. The opening hole on the course is representative of the challenge ahead. Accuracy off the tee throughout the front 9 will be rewarded. -
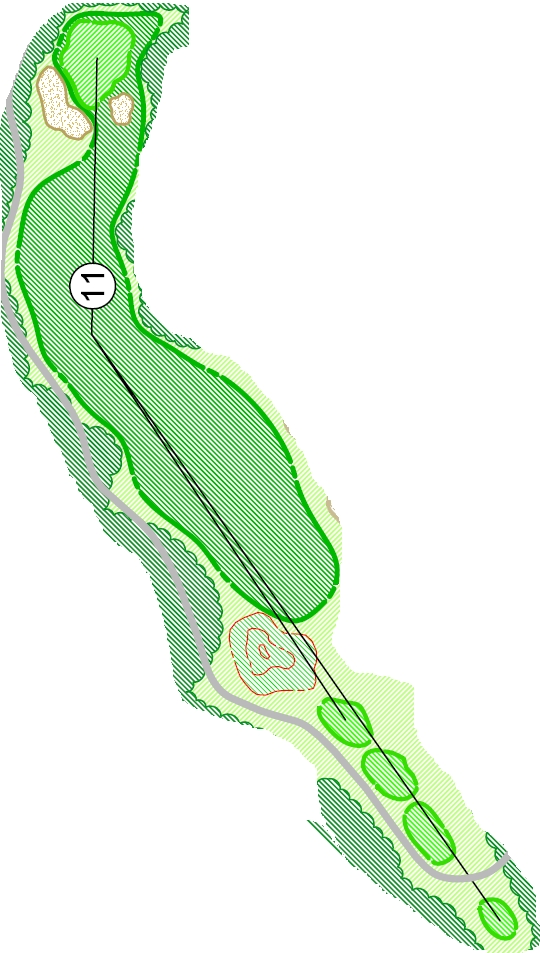
Hole #11
Pro Tip: 11. This downhill dogleg right par 4 is a very picturesque hole. A drive to the right will leave you with a very difficult approach over trees to a shallow green. -
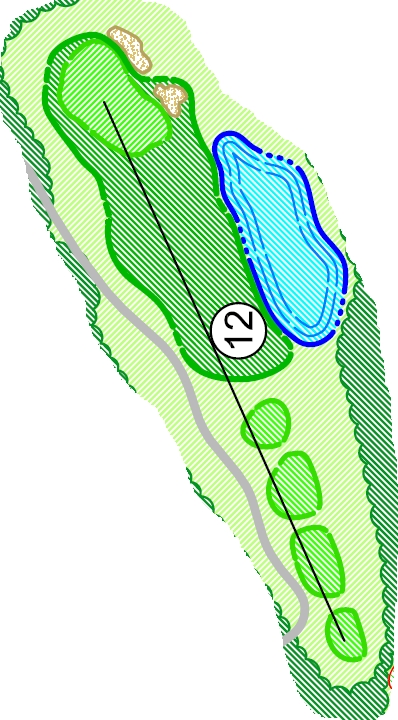
Hole #12
Pro Tip: 12. This natural meadow surrounded by Oak trees was the perfect site for this isolated par 3. A tee shot left of the bunker provides easy access to the green complex. -
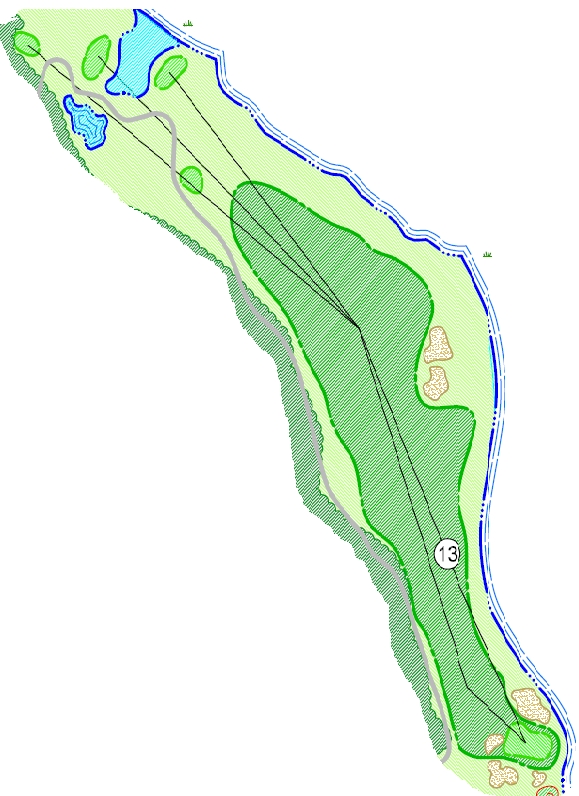
Hole #13
Pro Tip: 13. Elevated tee decks on this par 5 presents a stunning view of prairie vistas. Accuracy throughout this hole is of paramount importance if you wish to achieve par or better. -
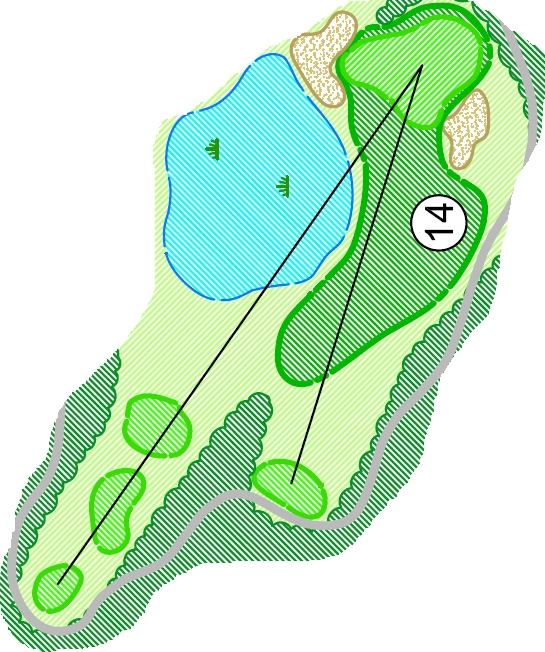
Hole #14
Pro Tip: 14. Teeing off within the Oaks to an elevated green that once again provides a stunning view of the prairies, this par 3 requires a tee shot that carries all the way to the green surface. Best to be below the pin for an easy 2-putt par. -
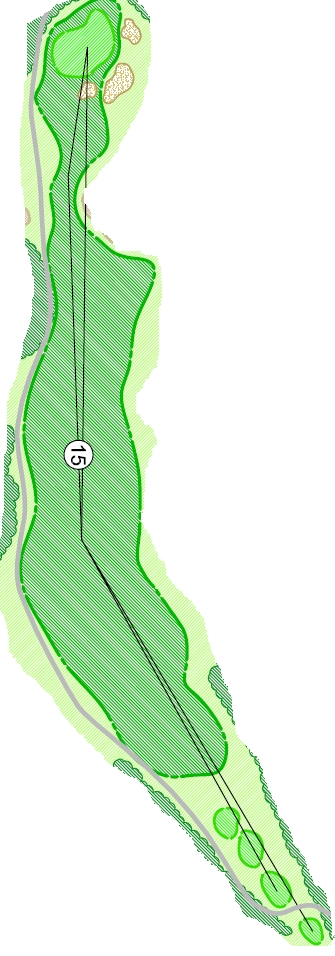
Hole #15
Pro Tip: 15. The longest par 5 on the course, this open hole allows you to rip it off the tee. Keep your drive away from a very large waste area on the right side and you will have an opportunity to reach the green in two. -
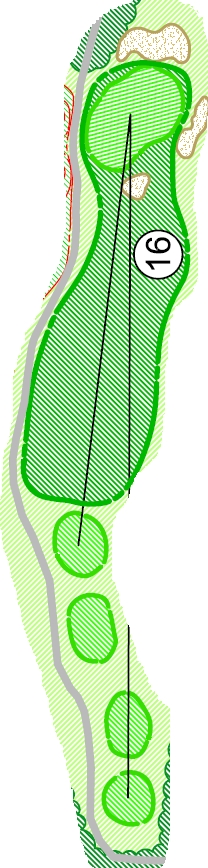
Hole #16
Pro Tip: 16. This long par 3 is without a water hazard but trouble looms all around the green complex. On the plus side the green is very large and receptive to a medium to long iron shot. -
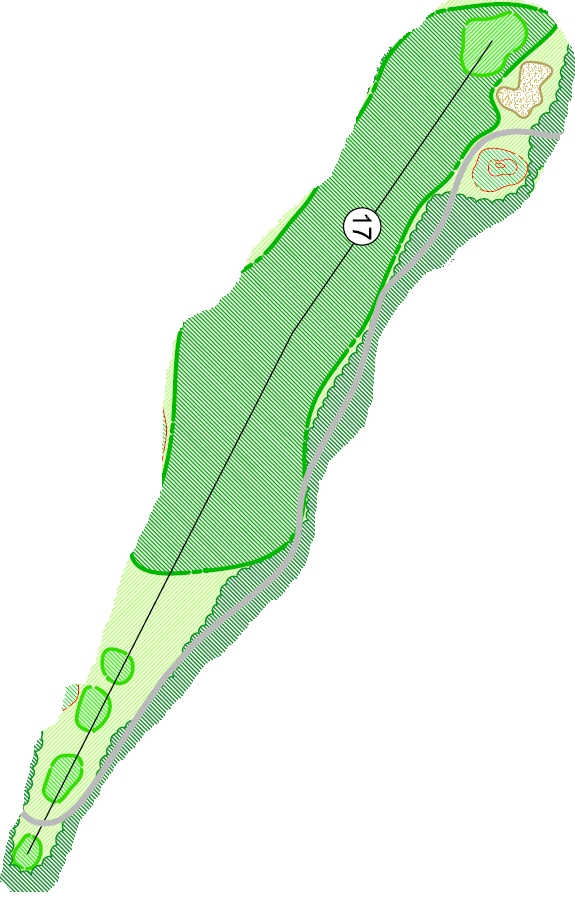
Hole #17
Pro Tip: 17. This par 4 dogleg right is another hole that requires accuracy off the tee. A good drive will leave with a mid to short iron into a large green. -
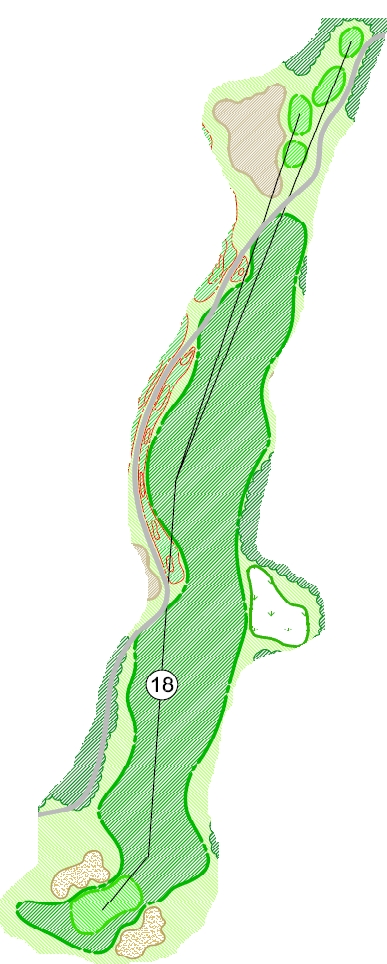
Hole #18
Pro Tip: 18. The 18th hole is a straightaway par 5 with large naturalized mounding on the right side and trees on the left. A good drive off the tee and an accurate second shot into a narrow green opening will give you a realistic shot at eagle.